Reference Implementation Development Guide
This page explains the method to run the project in your local environment.
Introduction
- Set up the environment for Linux, macOS or Windows (WSL2)
- For Windows: Recommend to use WSL2 Ubuntu LTS
- Please refer to Update to the latest version including Linux GUI support.
- Run the command
sudo apt-get install -y fonts-noto-cjkto install Japanese fonts.
- For Windows: Recommend to use WSL2 Ubuntu LTS
- Installing Node.js
- Please refer to Downloading Node.js or Installing Node.js by using package manager.
- For Windows: Please refer to Installing Node.js to Windows Subsystem for Linux(WSL2).
- Installing pnpm
- Please refer to Installing pnpm.
- For Windows: To install in a WSL2 environment, see "Using other package managers".
- Install in a WSL2 environment by running a command such as
npm install -g pnpm@latest-11.
- Installing Docker and Docker Compose
- Please refer to Installing Docker Compose
- For Windows: Please refer to Get started with Docker remote containers on WSL 2.
- Run the following commands in your terminal
git clone -c core.symlinks=true https://github.com/originator-profile/originator-profile originator-profile
cd originator-profile
pnpm install
pnpm --filter @originator-profile/inspector exec playwright install --with-deps
pnpm build
# Installing opvc CLI
npm i -g ./packages/opvc
# The --load-extension flag has been removed in Google Chrome 137 and later, so
# You must use Chromium, which is included with Playwright.
export CHROME_PATH=$(pnpm --filter @originator-profile/inspector exec node -p 'require("playwright").chromium.executablePath()')
# Start development server
pnpm dev
# => This command starts development server and Web browser (<Ctrl-C>: Exit)
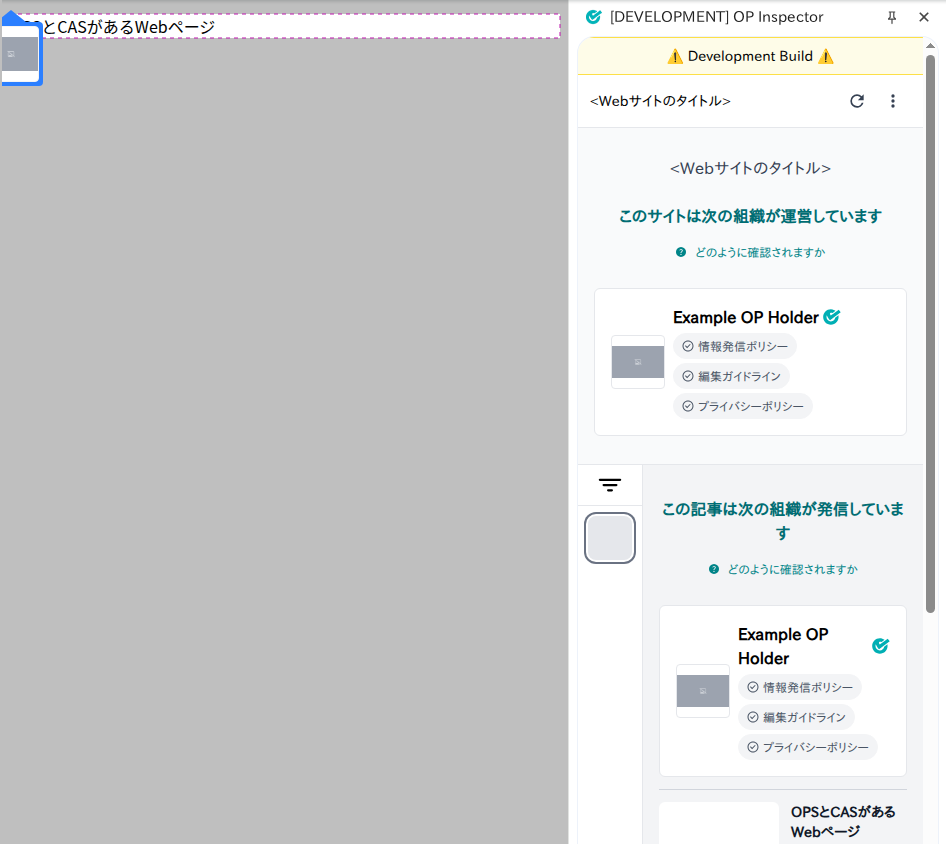
After starting development server and Web browser extension, you can verify the Web page actually.
- First, access to http://localhost:8080/examples/cas-1.html.
- Source code:
apps/inspector/dev/src/pages/examples/cas-1.astro
- Source code:
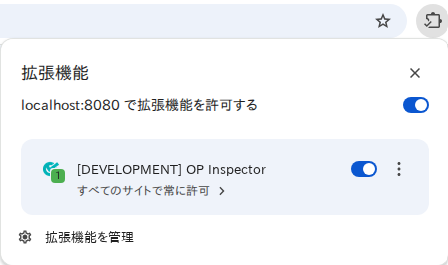
- After that, start Web browser extension and verify the contents information.
How to start
The display when the verification executed successfully
Then, you can carry out development by editing each source code. Customize as you like!
API Deprecation Policy
This document explains the API deprecation policy.
The entire structure
- apps/ … Source code of the application
- inspector … Source code of the browser extension
- packages/ … Source code of the module which the application uses
- model … Package for the static structure which becomes system's core
- core … Package for the function which becomes system's core
- (Other) ... Packages being developed in the originator-profile repository
- package.json … Information which relates the project (package.json)
- .github/workflows/ … Definition of the GitHub Actions' workflow
Useful commands
Here are some useful commands for testing or running build.
Running npm scripts:
pnpm run
npm scripts
dev : This script starts development server and Chromium with extension
The --load-extension flag has been removed in Google Chrome (official build) 137 and later, so we are using the Chromium included in Playwright. Make sure the CHROME_PATH environment variable is set.
The browser extension will be displayed in Japanese if the configured language is set to Japanese. Otherwise, it will be shown in English. To switch to Japanese, you can follow the methods below depending on your OS.
For Linux OS:
Japanese will be shown when you set environment variable LANG or LC_ALL to ja_JP.utf-8 or other ja. Otherwise, English will be shown.
For macOS: You can set the language to Japanese or another language using one of the following methods. If the set language is Japanese, it will be displayed in Japanese; otherwise, it will be displayed in English. If the language is not set, please do one of the following:
The browser that launches will vary depending on your macOS version. Please configure the language settings of the browser that launched.
For Google Chrome:
-
In System Preferences, go to "General" -> "Language & Region" -> "Applications," add Google Chrome, and set it to Japanese (or another language). This only affects Google Chrome.
-
Run
defaults write com.google.chrome AppleLanguages '(ja-JP)'. Replaceja-JPwithen, etc. This has the same effect as step 1. -
In System Preferences, go to "Language & Region," and set Japanese (or another language) as the highest priority language. This affects the entire system.
-
Run
defaults write -g AppleLanguages '(ja-JP)'. Replaceja-JPwithen, etc. This has almost the same effect as step 3, but removes the priority of other languages.
For Google Chrome for Testing:
- In System Preferences, go to "General" -> "Language & Region" -> "Applications," add Google Chrome for Testing, and set it to Japanese (or another language). This only affects Google Chrome for Testing.
If it doesn't appear in the "Applications" list, run open ~/Library/Caches/ms-playwright/chromium-1217/chrome-mac-arm64/Google\ Chrome\ for\ Testing.app/ to configure it while it's running.
-
Run
defaults write com.google.chrome.for.testing AppleLanguages '(ja-JP)'. Changeja-JPtoen, etc. This has the same effect as step 1. -
In System Preferences > Language & Region, set Japanese (or another language) as the highest preferred language. This affects the entire system.
lint : This script executes static code analysis to entire package
test : This script executes test to entire package
e2e : This script starts development server and executes E2E test
wordpress:e2e : This script starts development server and executes E2E test for WordPress plug-in
However, you have to resolve Composer dependencies in advance.
Resolving Composer dependencies:
cd packages/wordpress
cp .env.development .env # on first setup
docker compose run --rm -w /var/www/html/wp-content/plugins/ca-manager wordpress composer install
build : This script build entire package, such as generating extensions.
format : This script formats code.
GitHub Actions
Changes on the GitHub repository is automatically checked.
originator-profile/profile/test
This executes entire test including generating package, formatting code, executing static code analysis and E2E test.
E2E test reporting
When the E2E test on GitHub Actions failed, the report by playwright and snapshot image will be uploaded as artifacts. By using report directory playwright-report, which is got by opening Zip file as follows, you may know the cause of failure.
npx playwright@latest show-report path-to/playwright-report
In this project, test reports are configured to be saved in 'apps/inspector/playwright-report'. You can view the test reports in your local environment by providing this directory as an argument.
If the report does not open automatically after running pnpm e2e, please execute the following command:
Example command:
npx playwright show-report apps/inspector/playwright-report